Build an app for the puck.
Ember is open to tinker with. Flash it, set it up, and add an app of your own that turns, taps and tilts like the rest. This is the whole path, start to finish.
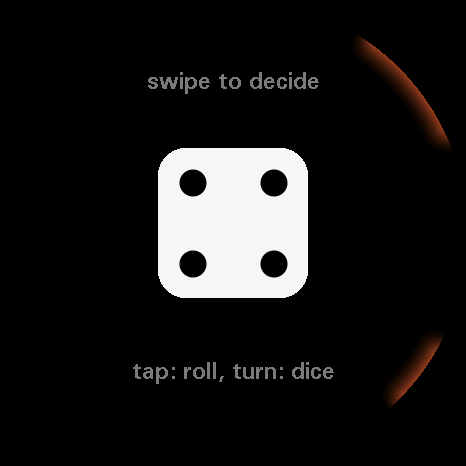
A round screen you turn and tilt
A 466 pixel round AMOLED. It sits on a desk or in a hand, so turning the whole thing is the main input. It is not a watch. The background on the panel stays pure black, because on AMOLED black is simply off pixels.
It has
- Turn (gyro and bezel drag), tap, hold, swipe
- Tilt, shake, pick-up, face-down
- A mic with pitch detection
- A small speaker: five short shared sounds, and a chiptune synth
- Wi-Fi, and Bluetooth as a Mac remote
- Clock, battery, USB-power sense
It does not have
- A compass
- Vibration, an LED, or a camera
- Bass below about 300 Hz
- Fast full-screen pixel effects (about 13 fps)
- Any view of the Mac's screen
Set the puck up
Ember takes over the whole puck. If you might want its old firmware back, save a copy of the flash before you start.
BackupKeep a copy first
Flashing Ember overwrites what was on the puck. Read the whole flash off first, and esptool's write-flash 0x0 puts it back later.
esptool read-flash 0 ALL puck-backup.bin
FlashBuild and upload
The quick way is the Settings page. With a puck already running Ember, press Update firmware and it flashes the new firmware from the browser, keeping your settings and apps. For a new puck in download mode (see below), the same page has an install path. It needs desktop Chrome or Edge.
To build from source instead, everything runs from the tinker/ folder, with arduino-cli behind one script.
# build only
./build.sh

# build and flash over USB
./build.sh -u
The port is found for you. Flashing takes a little while. Opening the serial port reboots the puck, which matters for the Wi-Fi apps.
Set upConnect from your browser
The config page talks to the firmware over Web Serial, so no reflash is needed to change settings. It runs in desktop Chrome or Edge, the browsers that support Web Serial.
cd config
python3 -m http.server
# then open http://localhost:8000/
Press Connect puck and pick the serial port. The page reads the current settings into the controls, then you set brightness, volume, the sleep timeout, the Home double-press shortcut, and the Wi-Fi and location that Clock and Weather use. The Config (JSON) box mirrors every control, so a profile copies out and pastes into the next puck. Only one program can hold the port, so disconnect the page before you flash again.
Build an app
Most apps are Lua packages now: a folder with main.lua and manifest.json, installed over USB with no reflash. apps/API.md in the firmware repo is the whole contract, and Make (part 3) writes them for you. The rest of this part is the native C++ route, for apps that need hardware the Lua API doesn't reach. Either way an app shares the same small shape, drops into the same menu, and speaks the same gestures.
One fileThe shape of an app
One app is one file: firmware/puck/app_<name>.cpp. It keeps its state in file-static variables and ends with a plain table of functions. The system clears the screen to black before draw() and flushes it after, so you just paint this frame. Only update and draw are required; the rest can be null. Here is a whole working app.
// app_hello.cpp
#include "puck.h"

static int count = 0;

// a glyph about s px across, centred on (x, y)
static void helloIcon(int x, int y, float s, uint16_t c) { disc(x, y, s * 0.4f, c); }

// in holds this frame's input (see the gestures below)
static void helloUpdate(const Input &in) {
  if (in.tap) { count++; puckClick(); }
}

static void helloDraw() {
  title("HELLO");
  char t[16]; snprintf(t, sizeof t, "%d", count);
  text(FN_NUM, t, 0, 8, WHT);          // centred: x=0 is screen centre
  hint("tap to count");
}

// name, icon, enter, update, draw, leave, alt, background
extern const App APP_HELLO = { "Hello", helloIcon, nullptr, helloUpdate, helloDraw, nullptr, false };
RegisterWire it into the build
Two small edits in puck.ino.
- Declare it and add it to
BUILTIN[]. The order doesn't matter: the Home shortcut is saved by name. - Add it to a folder. Drop
&APP_HELLOinto one of theF_*arrays. That is the only thing that puts it on screen.
// 1. the flat list
extern const App ... , APP_HELLO;
static const App *const BUILTIN[] = { ... , &APP_HELLO };

// 2. put it in a folder (this is what shows it)
static const App *const F_TOOLS[] = { &APP_KNOB, ... , &APP_HELLO };
PlaceThe menu it drops into
The launcher is two levels. The top level is six folders, one dot each on the rim. Tapping a folder opens the apps inside it. Coming back from an app lands you on that app in its folder, so the path back is the path you came in.
| Folder | Holds |
|---|---|
| Tools | Knob, Mac dial, Breathe, Focus, Timer, Tally, Level, Dice, Spin |
| Time | Clock, Day ring, Weather, Outside now, Moon, Standup, Wind rose |
| Games | Duel, Orbit, Dodge, Breakout, Stack, Safe, Marble, Simon, Ring snake |
| Faces | Home, Ember, Claude, Busy light, Snow globe |
| Sound | Tuner, Sound, Metronome |
| System | Settings, Apps, Make, Wi-Fi, Buttons, Sensors, Test |
cat in its manifest; a folder with many apps packs the dots closer.GesturesMake them mean the same thing
A gesture means the same thing in every app, so people know how to drive yours before they open it.
| Gesture | Always means |
|---|---|
| Turn | Adjust a value or move a selection. Rotating the puck and dragging the rim both count. |
| Tap | The main action: start, pause, confirm, open. |
| Swipe | Switch mode or page. |
| Hold | A second action that can be undone. If it destroys something, arm first and need a second hold within three seconds. |
| Back | Out one level. The lower, smaller rim button. |
| Home | The folder list, from anywhere. The upper, bigger rim button. |
Anything that counts time keeps counting after you leave it. Give it a background() function that holds its own clock, and bring the person back with one soft ping when it ends. For sound, use the kit: puckClick() on each step, kit(K_COMMIT) when a tap lands, kit(K_RESOLVE) for a win, kit(K_STOP) for a miss (sound(name) in Lua). Nothing loops or repeats.
DrawThe frame, and the tools for it
Read input in update(in), paint in draw(). The panel has no anti-aliasing of its own and no transparency, so draw filled shapes and fake transparency with dim(col, k). These helpers are already smooth, so reach for them before gfx->fill*.
- Shapes.
disc,pill,ring,stroke,tick. Aglow*version of each adds the soft halo, good for needles and dots, too slow for full rings. - Text.
text(font, str, x, y, col)is centred, sox=0is the middle of the screen.title()andhint()place a standard label and a bottom hint for you. - Fonts.
FN_NUM(big digits and colon only),FN_H1,FN_LBL,FN_SML. Draw a degree sign or a letter besideFN_NUMin another font, since it has none. - Input.
in.turn,in.tap,in.hold,in.swipe,in.press,in.touchingwithin.tx/ty, and tilt asin.tiltX/tiltY/az.
TestKeep the maths out of the firmware
Pure logic, parsing, number crunching, anything with a right answer, goes in a plain header with a host test in tests/. It runs on your Mac in a second, so you catch mistakes without a flash-and-squint cycle. Drawing and input stay in the .cpp.
CheckBuild, screenshot, time it
After ./build.sh -u, capture the app over USB and read the frames. The capture prints a frame time. Most screens draw in about 25 ms. Over about 45 ms, fix it before you ship.
uv run puck_shot.py /dev/cu.usbmodem101 out "Hello" +20 "@TAP" "=tapped"
Last, give it a store entry so the catalogue stays complete: a card in store.js and a shot in shots/ (a package carries its card in its manifest and its icon in the folder). Then commit and push.
Let Claude build it
The firmware repo ships a Claude Code skill that follows every rule on this page. You can start it from the puck itself, or from Claude Code on your Mac. Both routes need the setup in part 1.
From the puckMake
Make is an app in the System folder. You choose what to build on the puck, and a helper on your Mac runs Claude Code, flashes the result and opens the new app for you to try. You don't touch the terminal again after starting the helper.
You need a Mac with Claude Code signed in, uv, the build tools from part 1, and the puck on USB. Close the config page first, because the helper holds the serial port. Then, from tinker/:
uv run tools/maker/maker.py serve
Leave it running and open Make on the puck.
- Pick. Turn through the ideas in the backlog and tap one. Or hold and say your own idea, then let go and tap to confirm what the Mac heard. Voice not yet tried on a puck
- Answer. If Claude needs a decision, the puck pings and shows two to four choices. Turn and tap to answer. Not yet tried on a puck
- Wait. A ring shows the progress through writing, compiling and flashing. You can leave Make and use other apps meanwhile.
- Try it. The puck restarts and opens the new app. If the app crashes in its first 20 seconds, the helper puts the old firmware back by itself. Crash recovery not yet tried on a puck
- Review. Leave the app and Make asks how it went. Keep commits it and pushes. Change builds another round from a preset tweak or a note you say. Undo throws it away and flashes the last good build. Undo and spoken changes not yet tried on a puck
Each job runs in its own git worktree, so a build never touches what you have open in the main checkout. tools/maker/README.md has the details, and PROTOCOL.md beside it is the contract between the puck and the helper.
puck-app-builder
Ask Claude Code for a new puck app or an idea for the puck and the skill takes over. It reads what already exists, finds apps that suit a round turn-and-tap screen, lays out ideas with sizes and risks to pick from, then builds the picks to these exact conventions. Registration, folder, gestures, the frame budget, the store card, and the idea backlog all stay in step.
Use this route when you want to talk the idea through first. This page is the brief the skill follows, so you can read a build it made or write one by hand against the same rules.